
Install Internal Divider Shelves
From Under-Stair Shelving · Step 8 of 10 · Video by Shanty2Chic
Showing 4:56–5:53 of the source video. Watch the full video with every moment.
What happens in this clip
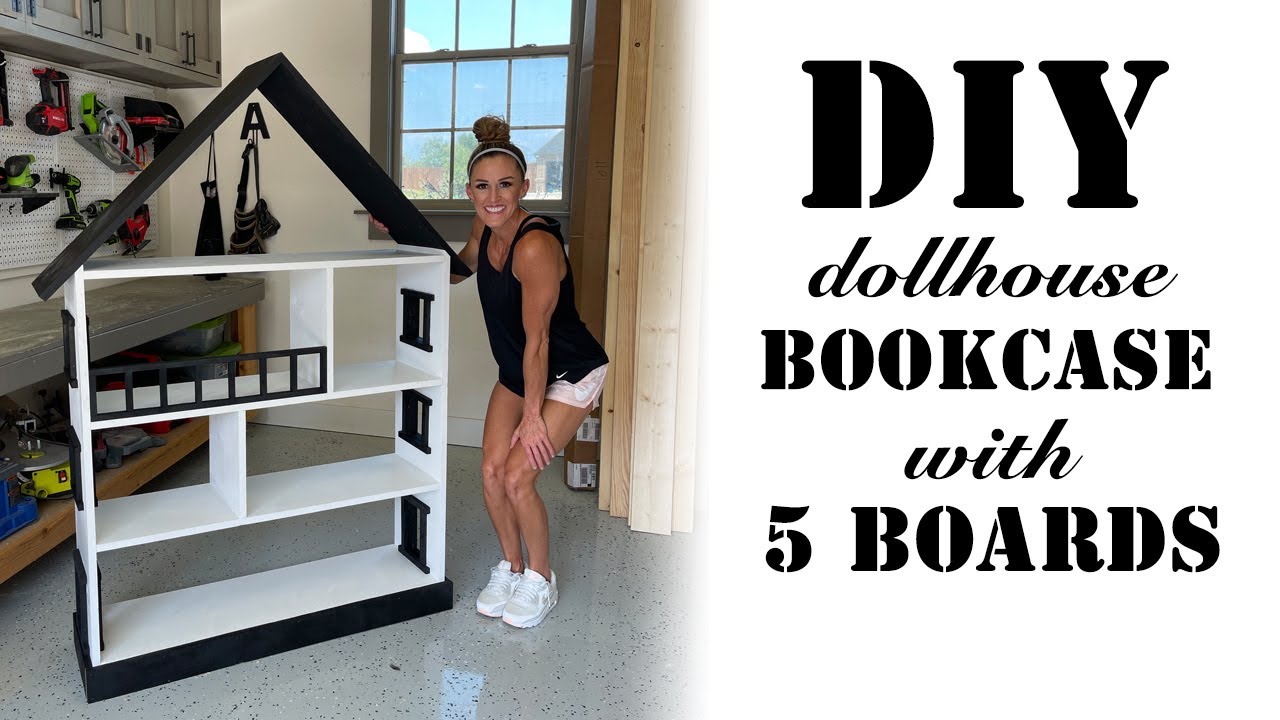
After the main frame is assembled, add the smaller internal divider shelves. Measure and mark the desired locations for these dividers on the main shelves using a tape measure and pencil. Ensure the markings are straight and square with a speed square. Apply a bead of wood glue to the edges of the divider shelves that will contact the main shelves. Secure the divider shelves in place using a brad nailer and 1 1/4" brad nails. This creates additional compartments within the bookshelf.
Goal: Add the internal divider shelves to create compartments.
What's used
Tools
- Brad Nailer Ryobi
- Brad Nails (1 1/4 inch)
- Pencil
- Safety Glasses
- Small Pine Boards
- Speed Square
- Tape Measure
Materials
- Wood Glue Gorilla Wood Glue
About the full video
This project details the construction of a versatile dollhouse bookshelf using pine wood, designed to function as both a bookshelf for a nursery and a playhouse as a child grows. The process involves cutting and shaping pine boards, drilling pocket holes for strong joints, assembling the main structure and internal shelves, pre-painting components, and finally attaching the roof, window trims, and balcony railing.
What's said in this clip
No. So, we've got the whole frame done. Now, we're going to add the two divider shelves and we're going to do that with wood glue AND NAILS. WOO! HEY THERE. OKAY, so what I'M DOING IS I'M MARKING 15 inches on the side of this bookcase using my speed square. Love these. This will just give me a nice straight line on this side. I'm going to repeat it on this side cuz it's going to make it easier to attach knowing that we are nice and straight. And then, I'll use my speed square again. Cut. I'm adding a line of wood glue above both lines. And then, we'll nail this side. Okay. All right, so we've got one divider. I'm measuring for the second divider. Okay. Now, we're going to do the same exact thing, attach it with 1 and 1/4 inch brad nails.
Automatically transcribed from the source video.
Step 8 of 10: Install Shelves
Position the shelves within the frame according to your design. Apply wood glue to the edges where the shelves meet the frame and secure them with screws. If you are installing adjustable shelves, attach the shelf pins or hardware according to the manufacturer's instructions.
Every video in Under-Stair Shelving
Step 1: Measure the Under-Stair Space
- 1:09–1:46 Measure, Cut, and Test-fit
- 0:09–1:25 Initial Measurements and Platform Design
Step 2: Design the Shelving Unit
- 0:13–0:17 Install Modular Shelving Frames
- 2:57–3:12 Construct Wider Center Shelves
Step 3: Create a Cut List
- 3:46–5:30 Create Cut List and Verify Thickness
- 0:38–1:39 Prepare Lumber and Cut List
- 0:02–0:04 Cut and Prepare Lumber
Step 4: Purchase Materials
- 0:00–0:03 Gather Materials and Tools
- 0:00–0:17 Gather Materials and Tools
- 0:00–0:49 Gather Tools and Materials
Step 5: Cut the Materials
- 1:03–2:43 Cut All Lumber to Size
- 1:18–1:29 Cut Timber to Length
- 0:11–0:58 Cut and Rip Lumber
Step 6: Sand All Pieces
- 1:24–1:29 Sand All Components
- 2:06–2:19 Sand All Cut Pieces
- 0:27–0:30 Sand Wood Pieces
Step 7: Assemble the Main Frame
- 2:26–2:55 Assemble Main Shelf Box
- 1:05–1:57 Assemble Vertical Side Frames
- 0:06–0:11 Assemble the Main Frame
Step 8: Install Shelves
- 5:42–6:03 Install Reinforced Shelves
- 4:56–5:53 Install Internal Divider Shelves (this video)
- 5:19–5:45 Install Shelves
Step 9: Finish the Unit
- 0:39–0:49 Paint and Install Hardware
- 0:43–0:49 Paint All Wood Components
- 12:47–13:48 Apply Wood Finish
Step 10: Install the Shelving Unit
- 3:20–4:12 Install & Secure Bookcase in Alcove
- 3:22–6:20 Install Shelf Units and Supports
- 0:13–0:17 Install Modular Shelving Frames
Questions about Under-Stair Shelving
What are the essential tools I need for accurate measurements in an angled under-stair space?
Beyond a standard measuring tape and pencil, an angle finder or a protractor is crucial for accurately capturing the slope of the stairs. Also, a long straight edge or level will help you mark level lines and check for plumb, ensuring your shelves are straight and true despite the angled surroundings.
Beyond basic hand tools, what power tools would make this under-stair shelving project easier for a beginner?
A miter saw or circular saw with a guide will significantly improve the accuracy and speed of cutting your lumber, especially for repetitive cuts and angles. An electric orbital sander is also highly recommended to efficiently prepare all pieces for finishing, saving you hours compared to hand sanding.
What are the most important safety precautions I should take when cutting and assembling lumber for this project?
Always wear safety glasses to protect your eyes from sawdust and flying debris. Use hearing protection when operating power tools and ensure your work area is clean and well-lit to prevent accidents. Make sure all lumber is securely clamped or supported before cutting to avoid kickback.
The project is listed as 'beginner' and '3 days'. Is this estimated time realistic for someone completely new to woodworking?
While classified as beginner, the 3-day estimate often assumes some prior familiarity with tools and a focused work schedule. If you're completely new, allow for extra time, especially for careful measuring, precise cutting, and thorough finishing, as these steps are critical for a professional-looking result. Don't rush the process.
What's a common mistake beginners make when measuring for under-stair shelving, and how can I avoid it?
A frequent mistake is not fully accounting for irregularities in the wall or floor, or failing to precisely capture the stair's varying angles, leading to shelves that don't fit snugly. To avoid this, create a detailed template using cardboard or scrap material for complex angles, and always 'measure twice, cut once' to confirm dimensions.
Are there alternative materials to dimensional lumber that might be easier for a beginner or offer a different look for under-stair shelving?
Plywood or MDF (medium-density fiberboard) can be good alternatives, often providing flatter surfaces and being easier to cut into large panels for shelves and backs. These materials typically require edge banding or painting for a finished appearance, which might add a different aesthetic and complexity to the finishing steps. Consider pre-made shelving kits for the simplest approach, though customization will be limited.
Under-Stair Shelving
Design and construct open shelving or a bookcase unit to fit within the under-stair space, maximizing storage and aesthetic appeal.
Read the full guide Browse all guides
Planning this project? Shop Oak Valley Designs.

Subscribe for exclusive updates
Be the first to know about promotions, new products, and sales.