
Measure Bullnose Edge Width
From how to install a carpet landing at the top of your stairs · Step 3 of 3 · Video by Oak Valley Designs
Showing 0:07–0:30 of the source video. Watch the full video with every moment.
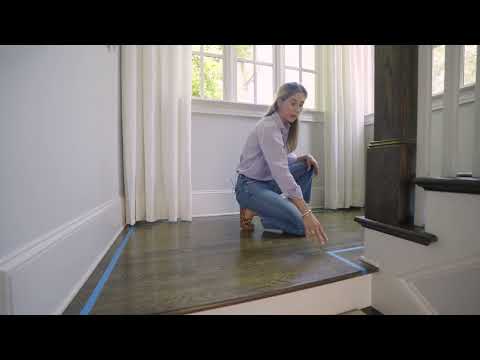
What happens in this clip
The most critical first step is to accurately measure the width of the bullnose edge of the stair landing. This measurement should correspond precisely to the width of the carpet stair tread installed on the step immediately below the landing. For example, if the stair tread is 35 inches wide, the landing carpet's edge should also be 35 inches wide to maintain visual continuity. Measure from the far left side to the far right side of the bullnose edge.
Goal: Begin by measuring the width of the bullnose edge of the landing, ensuring it matches the width of the carpet stair tread directly below it for a consistent look.
What's used
Tools
- Tape Measure
Pro tips for this step
- Oak Valley Designs Pro Tip: Order your landing carpet as a custom piece made from the same material and color as your stair treads for a seamless look.
These safety tips are AI-generated and have not been verified by a professional. They may be incomplete or incorrect. Verify independently against manufacturer instructions and local codes, and consult a qualified professional before relying on them. This is not a substitute for professional advice.
Shop this step at Oak Valley Designs

About the full video
This video details the specialized method of accurately measuring a stair landing for carpet installation. It involves using painter's tape to define the carpet's perimeter, ensuring precise cuts and a neat finish that aligns with existing stair treads and accounts for architectural features like posts.
What's said in this clip
Let's measure our landing. We have our carpet stair treads installed. We have our painters tape. And we're going to get some measurements for our matching landing. Step one, the most important piece. Make sure that the width of your bullnose edge matches the width of your carpet stair tread that's just below. So, in this case, it's 35 in. You got to go from the left side to the right side. After you do that, you're going to take
Automatically transcribed from the source video.
Step 3 of 3: Step 3: Placing Your Order for Custom-Made Carpet Pieces
With your precise measurements in hand, you're ready to bring your vision to life! Place your order for the landing carpet as its own custom-sized piece. At Oak Valley Designs, we understand the importance of a cohesive look, so make sure this landing carpet is crafted from the same high-quality material and matches the color of the stair treads you'll be using. This careful coordination is essential for achieving that seamless, professional finished appearance you're striving for – The Oak Valley Difference. Of course, you'll also need to order the individual carpet treads for every step both above and below your new landing, completing your easy DIY stair remodel with confidence and style.
Every video in how to install a carpet landing at the top of your stairs
Step 1: Step 1: Precise Measurement for Your Landing
- 1:10–1:26 Measure and Customize Tape Outline
- 0:07–0:30 Measure Bullnose Edge Width
- 0:30–0:48 Define Initial Perimeter with Tape
Step 2: Step 2: Measuring Your Individual Stair Treads for a Perfect Fit
- 0:54–1:39 Measure Stair Tread Depth
- 0:21–0:53 Measure Stair Tread Width
- 0:00–0:02 Prepare Stairs and Measure
Step 3: Step 3: Placing Your Order for Custom-Made Carpet Pieces
- 1:10–1:26 Measure and Customize Tape Outline
- 0:07–0:30 Measure Bullnose Edge Width (this video)
- 0:30–0:48 Define Initial Perimeter with Tape
how to install a carpet landing at the top of your stairs
Ready to transform your staircase? This DIY-friendly guide empowers you to achieve a beautiful, professional-looking result by detailing how to measure and install a carpet landing at the top of your stairs. We'll clarify that the landing requires a distinct, custom-sized carpet piece, not a standard stair tread, and walk you through accurate measurement techniques for all landing shapes, including tricky angles. Learn the essential dimensions and the correct installation sequence – securing the landing first, then your individual stair treads – to ensure a seamless, stylish, and safe transition for your family.
Read the full guide Browse all guides
Planning this project? Shop Oak Valley Designs.

Subscribe for exclusive updates
Be the first to know about promotions, new products, and sales.