
Understand the No-Holes Banister Installation Kit
From How to Install a Baby Gate at the Top of Stairs Without Drilling into the Banister · Step 1 of 4 · Video by KidSmartLiving
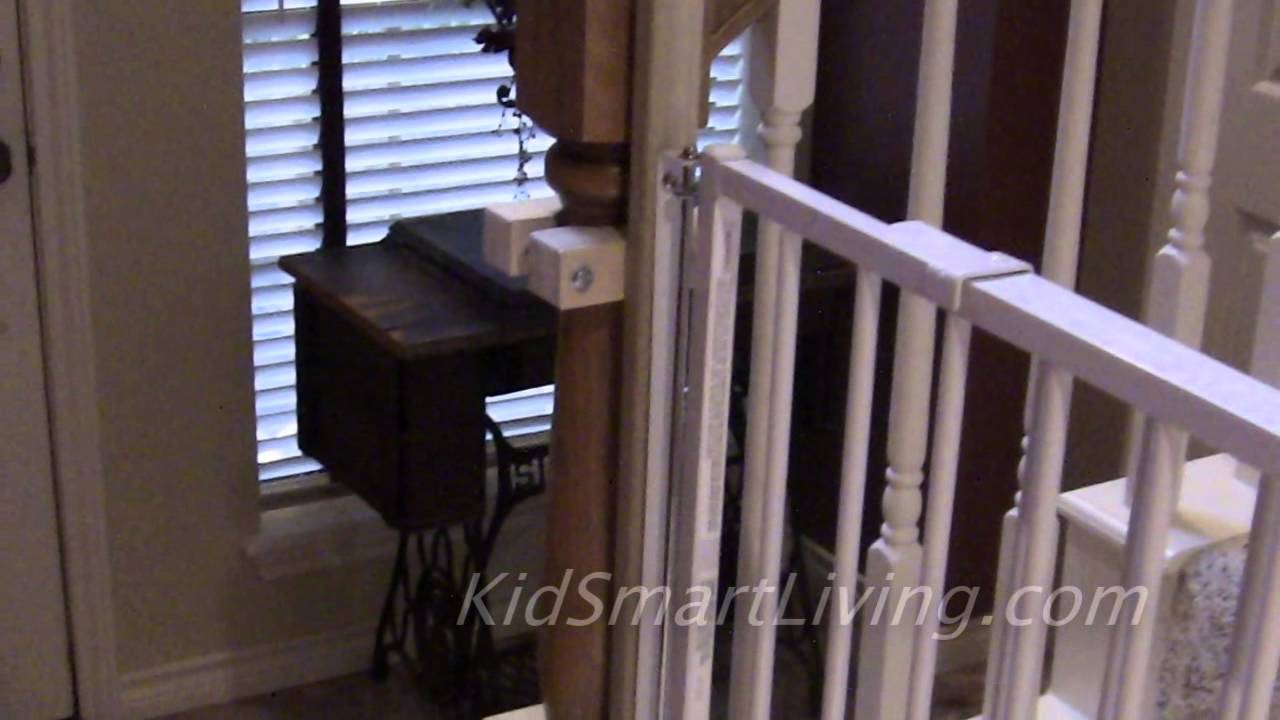
Showing 0:14–0:26 of the source video. Watch the full video with every moment.
What happens in this clip
The first step is to familiarize yourself with the no-holes banister installation kit. The kit typically consists of two wooden clamps and a 34-inch long wooden board. This kit is designed to be versatile, accommodating most standard banister post styles and can be painted or stained to match your home's existing decor.
Goal: Familiarize yourself with the components and features of the installation kit.
What's used
Tools
- 34-inch long wooden board KidSmartLiving.com
- No-Holes Banister Installation Kit KidSmartLiving.com
- Wooden Clamps KidSmartLiving.com
About the full video
This project demonstrates an easy, no-drill method for installing baby safety gates onto stairway banisters. It utilizes a specialized installation kit composed of clamps and a wooden board to create a secure mounting surface without damaging the existing woodwork. The kit is versatile, fitting various banister styles and compatible with several baby gate brands.
Step 1 of 4: Install Banister Clamp Mounts
Position the clamp mounts around the banister posts at the desired height for the gate. Ensure the rubber padding is in place to protect the banister finish. Tighten the clamps securely using the provided hardware, ensuring they are level and firmly attached without overtightening. These mounts will serve as the anchor points for the gate hardware.
Every video in How to Install a Baby Gate at the Top of Stairs Without Drilling into the Banister
Step 1: Install Banister Clamp Mounts
- 0:27–0:33 Attach Clamps to the Banister Post
- 0:14–0:26 Understand the No-Holes Banister Installation Kit (this video)
- 0:43–1:10 Install Baby Gate and Verify Compatibility
Step 2: Attach Gate Mounting Plate to Wall Stud
Step 3: Assemble and Install Gate Hardware
- 2:15–2:40 Install Spindles and Final Gate Mounting
- 5:29–6:07 Install Gate to Staircase
- 1:11–1:37 Install Spindle Rods and Position Gate
Step 4: Test Gate Stability and Latch Function
- 0:03–0:05 Test Gate Latch and Swing
- 17:06–18:29 Test Gate Functionality and Latch
- 1:51–1:59 Test Gate Operation
How to Install a Baby Gate at the Top of Stairs Without Drilling into the Banister
Outline for installing a baby gate at the top of stairs without drilling into the banister, focusing on using alternative mounting methods and hardware.
Read the full guide Browse all guides
Planning this project? Shop Oak Valley Designs.

Subscribe for exclusive updates
Be the first to know about promotions, new products, and sales.