
Reinstall Dome Light Cover
From How to Remove a Ceiling Light Cover to Change the Bulbs · Step 5 of 7 · Video by 1A Auto: Repair Tips & Secrets Only Mechanics Know
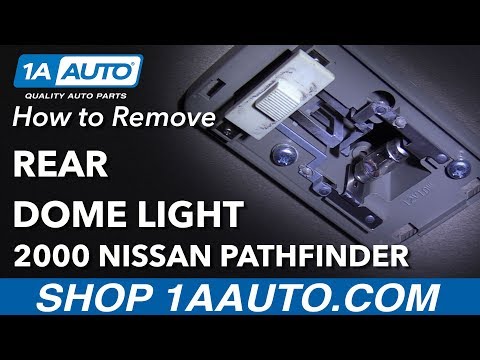
Showing 0:57–1:08 of the source video. Watch the full video with every moment.
What happens in this clip
Take the plastic light cover and identify the two small tabs or hooks on one side. These tabs are designed to engage with corresponding slots or recesses on the main light housing. Insert these tabs into their respective slots first. Once the tabs are securely seated, gently push the opposite side of the cover upwards until it clicks into place. This indicates that the retaining clips have re-engaged, securing the cover firmly to the ceiling light fixture. Test the light to ensure proper operation.
Goal: The final step involves reattaching the plastic cover to the ceiling light fixture.
About the full video
This video provides a step-by-step guide on how to safely remove the plastic cover of a car's rear ceiling light (dome light) using a standard flat-blade tool, which is a common preliminary step in ceiling light removal or bulb replacement. It then demonstrates the process of removing the old bulb, identifying it as an SV8 type, reinstalling the bulb, and finally snapping the light cover back into place.
Step 5 of 7: Reattach the light fixture cover
Align the light fixture cover with the fixture base. If it uses screws, insert and tighten them until the cover is secure but not overly tight. If it's a twist-lock type, align the tabs or slots and twist clockwise until it locks into place. Ensure it is firmly attached.
Every video in How to Remove a Ceiling Light Cover to Change the Bulbs
Step 1: Turn off power to the light fixture
- 0:50–1:05 Turn Off Power at Circuit Breaker
- 0:47–0:52 Turn Off Power at Circuit Breaker
- 0:03–0:05 Shut Off Power to the Circuit
Step 2: Remove the light fixture cover
- 1:50–2:38 Remove Old Light Fixture Glass Cover and Bulbs
- 1:03–1:50 Remove Light Fixture Cover
- 0:17–0:23 Remove Light Bulb Cover and Bulbs
Step 3: Remove old light bulbs
- 0:34–0:50 Unscrew Old Bulb
- 1:50–2:05 Remove Light Bulbs
- 0:38–1:04 Remove the Old Bulb
Step 4: Install new light bulbs
- 1:15–1:30 Install New Light Bulb
- 1:04–1:12 Install the New Bulb
- 0:26–0:31 Install the New Light Bulb
Step 5: Reattach the light fixture cover
- 6:11–6:23 Replace the Fixture Cover
- 0:57–1:08 Reinstall Dome Light Cover (this video)
- 0:55–1:09 Install the Light Cover
Step 6: Restore power to the light fixture
- 10:35–10:39 Restore Power and Test the New Fixtures
- 2:59–3:02 Restore Power
- 2:11–2:21 Restore Power and Test
Step 7: Test the light fixture
- 9:22–9:55 Restore Power and Test
- 8:04–8:19 Restore Power and Test
- 2:47–2:52 Test New Light Fixture
How to Remove a Ceiling Light Cover to Change the Bulbs
Outline for removing a ceiling light cover to change bulbs.
Read the full guide Browse all guides
Planning this project? Shop Oak Valley Designs.
Subscribe for exclusive updates
Be the first to know about promotions, new products, and sales.