
DIY Staircase Makeover With DIY LED Lighting // Renovation
Video by Andy Bird Builds · 2 moments used in Oak Valley Designs's DIY guides · 10:37 long
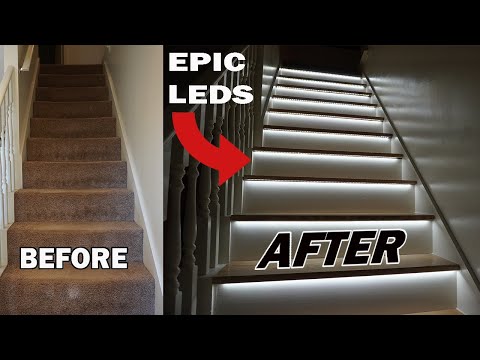
Moments in this video
- 1:47–2:00 Fill and Sand Risers
From How to Get a Hardwood Look on Carpeted Stairs, Step 10: Sand Repaired Areas and Final Surface
After installing the plywood risers, fill any visible nail holes and small gaps or imperfections with wood filler. Allow the wood filler to dry completely according to the manufacturer's instructions. Once dry, use a sander (either manual or orbital) to smooth the filled areas and the entire surface of the risers, creating a uniform and paint-ready finish.
- 7:51–8:14 Round Over Edges and Sand Treads
From How to Protect Hardwood Stairs from Wear with Removable Treads, Step 3: Prepare Tread Edges (Optional)
Use a router with a round-over bit to soften and shape the top and bottom edges of each hardwood tread. After rounding the edges, perform a final sanding of all tread surfaces with an orbital sander. This prepares the treads for the polyurethane finish, ensuring a smooth feel and professional appearance.
Guides that use this video
More from the Oak Valley Designs DIY Hub
Read the guide Browse all guides
Planning this project? Shop Oak Valley Designs.
Subscribe for exclusive updates
Be the first to know about promotions, new products, and sales.