Prime and Paint Wainscoting
From Board and Batten Wainscoting Installation · Step 6 of 6 · Video by Albert Interior Designers
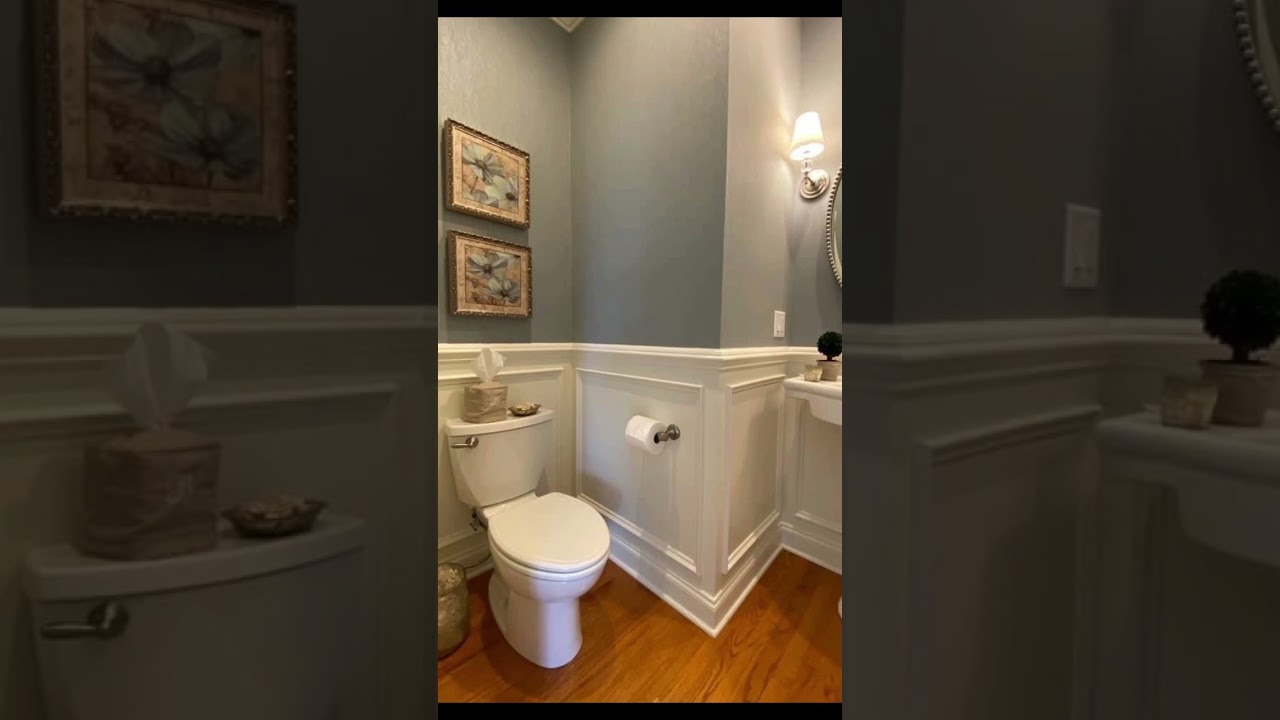
Showing 0:13–0:15 of the source video.
What happens in this clip
To prepare for painting, tape off any areas you don't want to get paint on, such as the top edge of the cap, adjacent walls, or flooring. Apply one even coat of a high-quality primer formulated for wood and trim to all newly installed wainscoting surfaces. This ensures good paint adhesion and a uniform finish. Once the primer is dry according to its instructions, apply two thin, even coats of your chosen paint color. A semi-gloss or satin finish in white is a popular choice for wainscoting, as seen in the video, due to its durability and ease of cleaning. Allow adequate drying time between coats.
Goal: Apply a durable and attractive finish to the wainscoting.
What's used
Tools
- Drop Cloths
- Old sheets
- Paint (Semi-Gloss or Satin) Sherwin-Williams
- Behr
- Paint Roller (Small/Trim) Purdy
- Paintbrush (Angled) Purdy
- Painter's Tape FrogTape
- Primer (Wood/Trim) Kilz
About the full video
This project guides you through the process of installing wainscoting in a powder room, enhancing its aesthetic appeal with a classic, sophisticated look. The instructions cover everything from initial planning and measurement to wall preparation, trim installation (including baseboards, top rails, vertical stiles, and optional mid-rails), and the final touches of caulking, filling, priming, and painting.
Step 6 of 6: Prime and Paint
Apply a coat of high-quality primer to all the new wood surfaces, including the top board, battens, and baseboard. Primer ensures even paint coverage and helps the topcoat adhere properly. Allow the primer to dry completely according to the manufacturer's instructions. Once dry, lightly sand any rough spots with fine-grit sandpaper and wipe clean. Apply your chosen paint color in two or more thin, even coats. Allow each coat to dry thoroughly before applying the next. For a smooth finish, use a high-quality paintbrush and roller.
Other videos for this step
Board and Batten Wainscoting Installation
This project outlines the steps for installing board and batten wainscoting on a staircase wall. It includes measuring, cutting materials, attaching the boards, and applying battens. The process will enhance the aesthetic appeal of the wall and provide a durable finish.
Read the full guide Browse all guides
Planning this project? Shop Oak Valley Designs.