
DIY Digital LED Stair Lighting - komiganled.com
Video by WifiLampLED · 4 moments used in Oak Valley Designs's DIY guides · 0:15 long
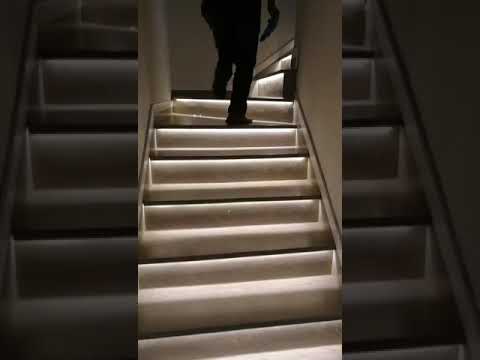
Moments in this video
- 0:00–0:02 Plan and Gather Components
From Staircase Lighting, Step 1: Plan LED Strip Layout
Before commencing the physical installation, a thorough planning phase is crucial. Begin by accurately measuring the width of each stair tread to determine the required length for each individual LED strip. Next, plan the optimal routing for all electrical wires, ensuring they can be discreetly hidden to maintain a clean aesthetic. Identify the best locations at both the top and bottom of the staircase for installing motion sensors to reliably detect movement. Finally, gather all necessary components: addressable LED strips (e.g., WS2812B or SK6812), an LED stair controller specifically designed for sequential lighting, two motion sensors (PIR sensors are commonly used), a suitable DC power supply, appropriate electrical wires for connections, and any mounting hardware like clips or screws.
- 0:00–0:02 Plan and Gather Components
From How to Install Motion-Sensor LED Strip Lights on Stair Treads, Step 1: Plan LED Strip Placement
Before commencing the physical installation, a thorough planning phase is crucial. Begin by accurately measuring the width of each stair tread to determine the required length for each individual LED strip. Next, plan the optimal routing for all electrical wires, ensuring they can be discreetly hidden to maintain a clean aesthetic. Identify the best locations at both the top and bottom of the staircase for installing motion sensors to reliably detect movement. Finally, gather all necessary components: addressable LED strips (e.g., WS2812B or SK6812), an LED stair controller specifically designed for sequential lighting, two motion sensors (PIR sensors are commonly used), a suitable DC power supply, appropriate electrical wires for connections, and any mounting hardware like clips or screws.
- 0:02–0:06 Mount LED Strips
From Staircase Lighting, Step 4: Mount LED Strips
Carefully cut the addressable LED strips to the pre-determined length for each stair tread, using the marked cut points on the strips. For each stair, attach one LED strip to the underside of the step nosing (the protruding edge), ensuring the illuminated side faces outwards or downwards to cast light on the tread below. Use the adhesive backing on the strips, reinforced with mounting clips and small screws, for secure attachment. Route the power and data wires from each LED strip along the underside or side of the stair, directing them neatly towards the chosen location for the LED stair controller. For a professional finish, conceal all wires as much as possible by running them along stair stringers, underneath treads, or behind baseboards.
- 0:12–0:15 Conceal and Finish
From Staircase Lighting, Step 7: Conceal Wiring
After confirming that the motion-activated stair lighting system operates perfectly to your satisfaction, proceed with the final aesthetic steps of concealment and tidying. Use cable ties, wire clips, or conduit to neatly bundle and secure any remaining visible wiring, preventing tripping hazards and contributing to a professional appearance. If not already completed, fully hide all electrical wires, the controller box, and the power supply unit. This can be achieved using decorative trim, specialized wire covers, or even by patching and painting over recessed wiring channels to seamlessly integrate them into the staircase and wall structure. Ensure that the motion sensors remain completely unobstructed and are not accidentally covered, as this would impair their functionality.
Guides that use this video
More from the Oak Valley Designs DIY Hub
Read the guide Browse all guides
Planning this project? Shop Oak Valley Designs.

Subscribe for exclusive updates
Be the first to know about promotions, new products, and sales.