

how to install carpet stair treads to make hardwood stairs safe for dogs
About This Guide
At Oak Valley Designs, we believe every home deserves safety and style, especially when it comes to your cherished hardwood stairs and beloved pets! This DIY-friendly guide empowers you to transform slippery steps into a secure, comfortable pathway using our innovative peel-and-stick carpet stair treads. Say goodbye to the hassle of glue, nails, or staples – our durable, pressure-sensitive adhesive backing ensures a fast, damage-free installation that's also removable and residue-free. It's truly a better way to tread, providing peace of mind for families with children or pets. We'll walk you through each simple step, from preparing your stairs to achieving that perfect, professional finish. You'll learn how to clean and dry your stairs for optimal adhesion, precisely align your custom-fit treads, and secure them for a lasting bond. Our treads are designed to protect your beautiful wood while making your stairs safer, more stylish, and built for everyday life. Experience the Oak Valley Difference: quality, safety, and easy DIY success!
Tools & Materials

Steps
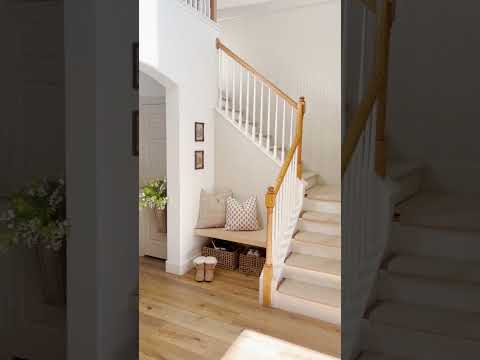
Prepare Your Stairs: Clean & Dry for a Perfect Bond
This first step is foundational to achieving the professional-looking results and lasting safety you expect from Oak Valley Designs. We recommend beginning by meticulously cleaning each hardwood stair step. Use a vacuum or a clean, damp cloth to banish all dust, dirt, and grease. Think of it as preparing a perfect canvas for your new treads! Any lingering residue or moisture can compromise the integrity of our innovative adhesive backing, which means your treads might not bond securely and could shift. It's absolutely crucial to allow the surface to dry completely – patience here pays off! If you find any rough or uneven spots on your steps, a light sanding will create an ideal smooth surface for adhesion. A quick, but important, safety note: please avoid applying treads over stairs that have been freshly painted or varnished, as our adhesive is crafted to bond with cured surfaces, not new finishes.

Align with Precision: Mark Your Center
Before you begin placing any treads, take a moment to accurately mark the center of each stair step. A pencil or chalk works perfectly for this. This center mark will become your trusted guide, ensuring each tread is placed perfectly straight and evenly across your stairs. Because our treads are custom-made to fit, you'll find that significant trimming isn't typically needed, which simplifies this alignment process even further. This attention to detail is part of The Oak Valley Difference, ensuring your staircase looks its best.
Preview Your Perfect Placement: Dry-Run First!
We love empowering you with confidence in your DIY projects! Before you peel away that protective adhesive backing, we highly recommend performing a 'dry-run.' Gently place each carpet stair tread onto its designated step. This allows you to visually confirm its position, ensuring it aligns beautifully with your center marks and the step's edges. This quick preview helps prevent any mistakes and guarantees that your final placement will be exactly as you envisioned, bringing warmth and elegance to your home.
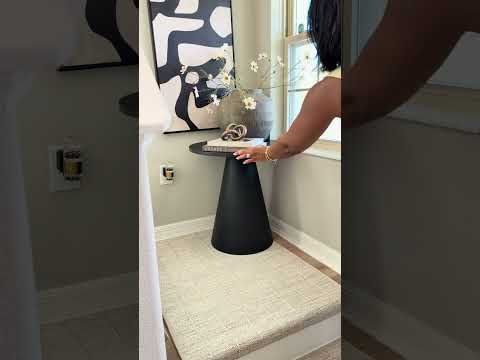
Begin Your Transformation: Peel & Place from the Top
Let's begin transforming your staircase! We recommend starting your installation from the uppermost step. This smart approach means you won't have to walk on any treads you've already secured, keeping them pristine. With confidence, carefully peel off the protective backing from the adhesive side of your first Oak Valley Designs carpet stair tread. Then, gently position the tread onto the step, using that helpful center mark as your guide for precise alignment. You're well on your way to making your stairs safer, more stylish, and built for everyday life!
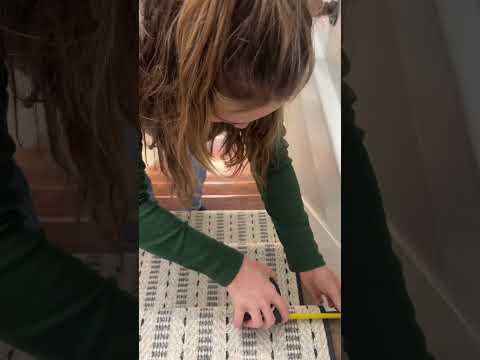
Secure the Bond: Press from Center Outward
Once your tread is perfectly placed, it's time to secure it firmly. Apply consistent pressure, starting right in the center of the tread and smoothly working your way outwards towards all the edges. This technique is essential for pushing out any trapped air bubbles, ensuring a beautifully smooth finish and a strong bond. After this initial press, go over the entire surface of the tread, paying extra attention to the corners and edges. This guarantees a secure bond that will prevent any part of the tread from curling or lifting. For an even more professional touch, a hand roller or a flat object can help seat the tread firmly, making sure every inch of our superior adhesive makes contact. This is how we ensure 'A better way to tread' for years to come!
Complete Your Project & Enjoy Peace of Mind: Repeat and Test
You're nearly there! Continue installing the remaining carpet stair treads by repeating steps 4 and 5, gracefully working your way down the staircase one step at a time. Once all your beautiful, custom-made treads are in place, it's time for the final check: walk on your stairs! Pay attention to how wonderfully secure and comfortable they feel underfoot. This is the moment you truly appreciate the difference. If you happen to notice any edge that needs a little extra love, simply press it down firmly again. In some cases, allowing a bit more time for the adhesive to achieve its maximum bond strength can be beneficial. Remember, our non-damaging adhesive allows for careful repositioning or removal if needed, ensuring your beautiful hardwood surface remains protected. Congratulations on making your stairs safer, more stylish, and built for everyday life – especially for families with children or pets!
Questions about your project or which product fits? Oak Valley Designs's team is happy to help. Mon–Fri 9–5 ET

Subscribe for exclusive updates
Be the first to know about promotions, new products, and sales.