

how to install stair treads without nails or tools
About This Guide
Ready to transform your staircase with confidence and ease? At Oak Valley Designs, we believe in a better way to tread. Our premium carpet stair treads feature a robust, pressure-sensitive adhesive backing, specially designed for a truly DIY-friendly installation. That means no nails, no glue, and no stress! This innovative method is not only quick and simple but also completely damage-free, ensuring your beautiful wooden stairs are protected. You'll achieve a professional, polished look and, most importantly, enhance the safety of your home – perfect for families with children or pets. Let's get started and elevate your staircase with peace of mind.
Tools & Materials

Steps

Prepare Your Steps: Clean, Dry, and Ready for Treads
This step is absolutely vital for the longevity and security of your treads! Dust, dirt, and grease are the enemies of a strong adhesive bond and can cause your beautiful new treads to lift or shift over time, compromising safety. Thoroughly vacuum or wipe down each step. Then, allow the surface to dry completely – even the slightest bit of moisture can weaken the bond. If your steps have any rough or uneven spots, a light sanding will help create an ideal surface. A crucial tip: avoid applying treads over freshly painted or varnished stairs, as the adhesive won't bond properly to a new, curing finish. Patience here pays off in professional-looking, secure results!
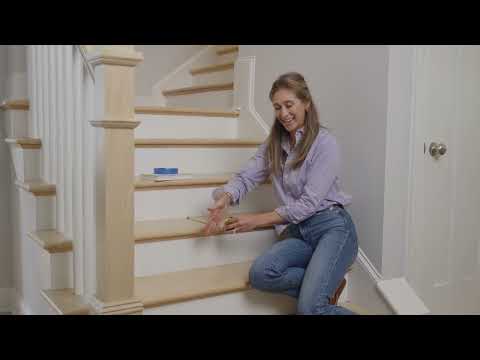
Precision Placement: Measure and Mark Your Centerline
For that truly custom, polished look, take a moment to measure and mark the center of each step using a pencil or chalk. This simple centerline will be your guide, ensuring every single tread lines up beautifully and evenly. One of the many benefits of choosing Oak Valley Designs is that our treads are custom-made to fit your stairs, which means you'll rarely, if ever, need to worry about trimming!
The Perfect Preview: Dry-Run Your Tread Placement
This smart tip ensures you're delighted with the final look! Before you peel the backing, lay each tread onto its designated step. This 'dry run' allows you to preview the exact placement, confirm your spacing, and ensure a perfect, custom fit. It's an easy way to build confidence and achieve professional-looking results without any stress!
Clean, Peel, and Stick: Starting from the Top
Now for the satisfying part! We recommend working from the top step downwards. This smart approach keeps you from stepping on and potentially disturbing the treads you've already securely installed. Simply peel the protective backing from your first Oak Valley Designs tread, carefully align it with the center mark you made, and gently place it onto the step. The beauty of our adhesive is its forgiving nature, allowing slight adjustments before firm pressure.
Secure the Bond: Press from the Center Out
To ensure a truly secure and lasting bond, apply firm, even pressure to the tread. Start from the very center and work your way outwards towards the edges. This technique is key to pushing out any trapped air bubbles and creating a smooth, flush finish. Pay extra attention to firmly pressing down all corners and edges – this prevents any curling or lifting, ensuring your treads stay put and look fantastic. A hand roller or even a flat, clean object can be a great help here to really seat the tread firmly, giving you confidence in its stability.
Steps to Success: Repeat and Enjoy Your Safer Stairs!
Now, simply repeat steps 4 and 5 for each remaining step, working your way down the staircase. Once all of your beautiful Oak Valley Designs treads are in place, take a moment to walk on your newly elevated staircase. This is your chance to feel the enhanced safety and stability! If you notice any edges that aren't perfectly flush, simply press them down firmly again. In rare cases, a bit more time for the adhesive to fully set can also do the trick. Congratulations – you've just created a safer, more stylish home environment, all by yourself!
Questions about your project or which product fits? Oak Valley Designs's team is happy to help. Mon–Fri 9–5 ET

Subscribe for exclusive updates
Be the first to know about promotions, new products, and sales.