
Hardwood Flooring on Stairs: Installing Open Sided Staircase Nosing Tread and Riser from A to Z
Video by MrYoucandoityourself · 3 moments used in Oak Valley Designs's DIY guides · 2:55 long
Moments in this video
- 0:35–0:46 Install the Riser Boards
From How to Get a Hardwood Look on Carpeted Stairs, Step 6: Install Hardwood Risers
For each stair, begin the installation by applying a substantial amount of construction adhesive, such as Loctite PL Premium 3X Stronger, in a serpentine or wavy pattern across the entire surface of the existing riser. This ensures maximum contact and strong bonding. Carefully position the pre-cut hardwood riser board against the adhesive, pressing it firmly into place. Use a pneumatic nail gun, like the Hitachi model demonstrated, to face-nail the riser board along its top and bottom edges for additional security. Immediately after placement, use a scraper or damp cloth to clean any excess adhesive that may squeeze out, preventing it from drying on finished surfaces.
- 0:49–2:35 Install the Tread and Nosing Components
From How to Get a Hardwood Look on Carpeted Stairs, Step 7: Install Hardwood Treads
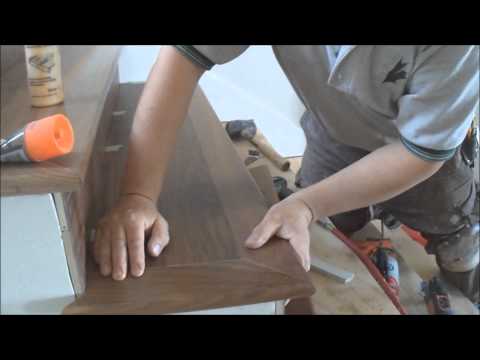
Following the riser installation, focus on the tread and nosing for each step. If your tread requires multiple hardwood planks to cover its width, interlock them using wood glue on the tongue and groove joints for enhanced stability. Next, apply construction adhesive in a wavy pattern across the entire plywood sub-tread. Carefully position the assembled hardwood tread onto the adhesive, making sure it fits snugly against the installed riser and aligns correctly along the open side of the staircase. Tap the tread gently with a rubber mallet to ensure full contact and a tight fit. The video demonstrates cutting angled flooring pieces with a utility knife to fit the open side. Finally, install the nosing: apply wood glue to its groove (or tongue) and construction adhesive to the edge of the sub-tread and the top of the riser. Position the nosing, tap it with a rubber mallet, and blind-nail it through the tongue into the sub-tread, or face-nail if necessary (ensuring nails are counter-sunk and later filled). Use shims or small wedges to hold all components tightly in place while the adhesive cures.
- 0:49–2:35 Install the Tread and Nosing Components
From How to Protect Hardwood Stairs from Wear with Removable Treads, Step 5: Install Securing Mechanism
Following the riser installation, focus on the tread and nosing for each step. If your tread requires multiple hardwood planks to cover its width, interlock them using wood glue on the tongue and groove joints for enhanced stability. Next, apply construction adhesive in a wavy pattern across the entire plywood sub-tread. Carefully position the assembled hardwood tread onto the adhesive, making sure it fits snugly against the installed riser and aligns correctly along the open side of the staircase. Tap the tread gently with a rubber mallet to ensure full contact and a tight fit. The video demonstrates cutting angled flooring pieces with a utility knife to fit the open side. Finally, install the nosing: apply wood glue to its groove (or tongue) and construction adhesive to the edge of the sub-tread and the top of the riser. Position the nosing, tap it with a rubber mallet, and blind-nail it through the tongue into the sub-tread, or face-nail if necessary (ensuring nails are counter-sunk and later filled). Use shims or small wedges to hold all components tightly in place while the adhesive cures.
Guides that use this video
More from the Oak Valley Designs DIY Hub
Read the guide Browse all guides
Planning this project? Shop Oak Valley Designs.

Subscribe for exclusive updates
Be the first to know about promotions, new products, and sales.