
How To Make Your Own DIY No Slip Paint / Anti Slip Paint / Non-Slip Paint
Video by Vinchero Karpintero · 6 moments used in Oak Valley Designs's DIY guides · 4:11 long
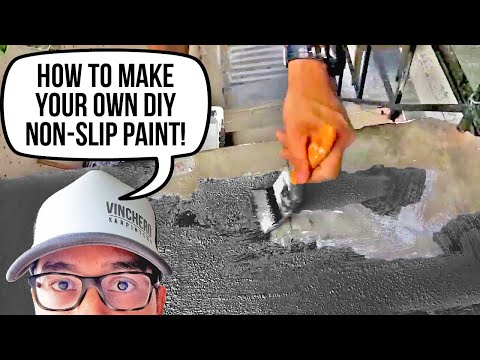
Moments in this video
- 1:13–1:37 Prepare the Surface
From How to Keep Outdoor Stairs Safe in Ice and Snow, Step 2: Clean Stair Surfaces
Before applying any paint, thoroughly clean the concrete surface of the stairs. Use soap and water to remove any dirt, grime, moss, or loose debris. Scrub the surface well and then rinse it thoroughly. Crucially, allow the surface to dry completely. The presenter cleaned his stairs the previous night and left them to dry overnight and for several hours in the morning sunlight, ensuring the surface was bone dry before painting.
- 1:13–1:37 Prepare the Surface
From How to Make Concrete Basement Stairs Non-Slip, Step 1: Prepare the Concrete Stairs
Before applying any paint, thoroughly clean the concrete surface of the stairs. Use soap and water to remove any dirt, grime, moss, or loose debris. Scrub the surface well and then rinse it thoroughly. Crucially, allow the surface to dry completely. The presenter cleaned his stairs the previous night and left them to dry overnight and for several hours in the morning sunlight, ensuring the surface was bone dry before painting.
- 2:27–3:10 Apply Paint to Stairs
From How to Make Oak Stairs Less Slippery, Step 3: Apply Anti-Slip Coating
Starting from the top step and working your way down, use a paintbrush to apply an even coat of the anti-slip paint mixture to the concrete treads. Ensure that each step is fully covered. The texture from the sand should be visible and palpable. Apply consistently, mixing the paint frequently in your tray to redistribute the sand, ensuring a uniform finish across all steps.
- 2:27–3:10 Apply Paint to Stairs
From How to Choose Between Carpet Treads, Grip Tape and Anti-Slip Coatings, Step 4: Select Primary Anti-Slip Solution
Starting from the top step and working your way down, use a paintbrush to apply an even coat of the anti-slip paint mixture to the concrete treads. Ensure that each step is fully covered. The texture from the sand should be visible and palpable. Apply consistently, mixing the paint frequently in your tray to redistribute the sand, ensuring a uniform finish across all steps.
- 2:27–3:10 Apply Paint to Stairs
From How to Make Concrete Basement Stairs Non-Slip, Step 2: Apply Anti-Slip Coating
Starting from the top step and working your way down, use a paintbrush to apply an even coat of the anti-slip paint mixture to the concrete treads. Ensure that each step is fully covered. The texture from the sand should be visible and palpable. Apply consistently, mixing the paint frequently in your tray to redistribute the sand, ensuring a uniform finish across all steps.
- 2:27–3:10 Apply Paint to Stairs
From How to Make Concrete Basement Stairs Non-Slip, Step 4: Apply Textured Paint
Starting from the top step and working your way down, use a paintbrush to apply an even coat of the anti-slip paint mixture to the concrete treads. Ensure that each step is fully covered. The texture from the sand should be visible and palpable. Apply consistently, mixing the paint frequently in your tray to redistribute the sand, ensuring a uniform finish across all steps.
Guides that use this video
More from the Oak Valley Designs DIY Hub
Read the guide Browse all guides
Planning this project? Shop Oak Valley Designs.

Subscribe for exclusive updates
Be the first to know about promotions, new products, and sales.