
Apply Anti-Slip Strip
From How to Make Concrete Basement Stairs Non-Slip · Step 3 of 5 · Video by Home Shringar
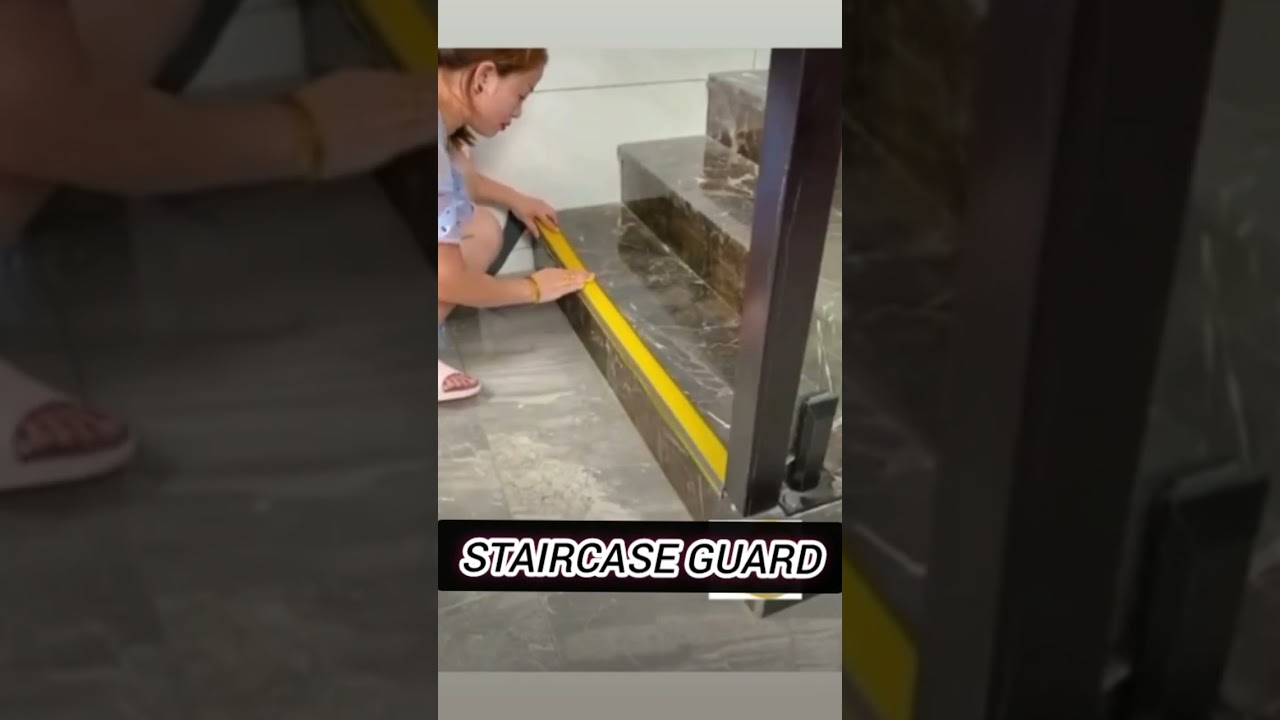
Showing 0:02–0:06 of the source video. Watch the full video with every moment.
What happens in this clip
Carefully peel back a section of the protective backing from one end of a pre-cut anti-slip strip. Align the exposed adhesive side of the strip along the edge of the stair, ensuring it is straight and centered. Slowly press the exposed part of the strip onto the stair, working from one end to the other, while gradually peeling off the rest of the backing. Once the entire strip is in place, firmly press down along its entire length with your hands to ensure good adhesion and to remove any trapped air bubbles.
Goal: Secure the anti-slip strip firmly to the stair edge
What's used
Tools
- Hands
- Squeegee
Materials
- Anti-slip staircase guard strip
About the full video
This project demonstrates the simple process of installing anti-slip "staircase guards" to prevent slips and falls on stairs. It involves preparing the stair surface, applying self-adhesive strips to the edge of each step, and trimming them to fit, significantly enhancing stair safety.
Step 3 of 5: Install Anti-Slip Tread Strips
Cut the anti-slip tread strips to the desired length to fit each stair tread. Ensure the stair treads are clean and completely dry. Peel the backing off the adhesive side of the strip and carefully position it on the stair tread, starting from the front edge and pressing firmly towards the back. Use a roller or a hard-edged tool to ensure maximum adhesion and to eliminate any air bubbles. Repeat for all stair treads.
Every video in How to Make Concrete Basement Stairs Non-Slip
Step 1: Prepare the Concrete Stairs
- 1:13–1:37 Prepare the Surface
- 0:28–1:00 Prepare Rough Concrete Steps for Resurfacing
- 1:13–1:50 Apply Cleaner to Stairs
Step 2: Apply Anti-Slip Coating
- 2:27–3:10 Apply Paint to Stairs
- 0:46–0:59 Spray Clear Anti-Slip Coating
- 0:51–4:06 Apply Adhesive-Backed Anti-Slip Products
Step 3: Install Anti-Slip Tread Strips
- 0:02–0:06 Apply Anti-Slip Strip (this video)
- 0:20–0:45 Peel and Adhere Strip
- 1:12–1:19 Prepare Steps and Apply Non-Skid Strips
Step 4: Apply Textured Paint
- 2:27–3:10 Apply Paint to Stairs
- 10:24–11:30 Final Paint and Allow to Dry
- 0:20–0:31 Painting the Staircase
Step 5: Cure and Inspect
- 1:23–1:32 Allow Coating to Dry and Enjoy the Renewed Surface
- 1:23–1:28 Allow Coating to Dry
- 1:49–2:10 Allow Coating to Cure and Verify Non-Slip Property
How to Make Concrete Basement Stairs Non-Slip
This project outlines methods to improve the slip resistance of concrete basement stairs, enhancing safety. Options include applying anti-slip coatings, installing tread strips, or using textured paints.
Read the full guide Browse all guides
Planning this project? Shop Oak Valley Designs.

Subscribe for exclusive updates
Be the first to know about promotions, new products, and sales.